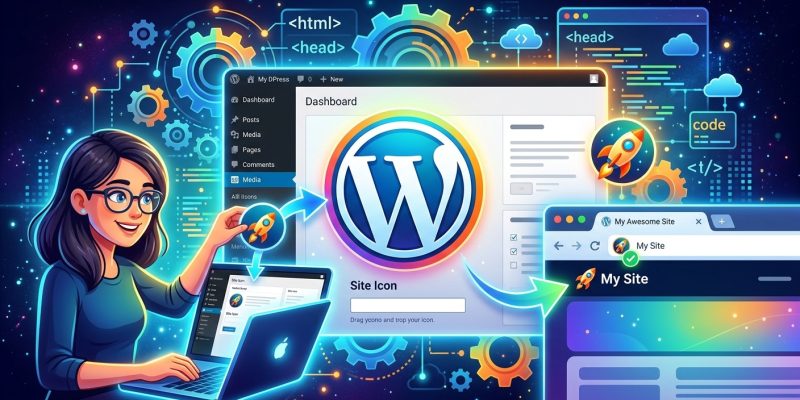
Open thirty browser tabs and line them up across the top of your screen. You know exactly which one is your email, which one is your bank, and which one is the YouTube video you paused before lunch. You are not reading the tab labels. You are reading the tiny square icons beside them. That is a favicon doing its job, quietly and effectively.
Now picture a potential customer who just visited your site. They save your page to their bookmarks, or they keep it open alongside five competitor sites while they decide who to call. If your tab shows a blank grey square instead of something that looks like a real business, you have already lost a small but measurable slice of credibility. A favicon is not decoration. It is a brand signal that works whether or not anyone consciously notices it.
This guide walks you through what a favicon is, how to add one to your WordPress site without touching any code, and how to confirm it is actually rendering on your live site before your customers see a problem you missed.
At a Glance
- A favicon is the small square icon that appears in browser tabs, bookmarks, and browser history
- WordPress calls it a “Site Icon” and lets you upload one directly inside the Customizer panel
- A 512×512 PNG file gives the sharpest results across all devices and screen sizes
- Browser and server caching often delays the update, so a blank tab after uploading is normal
- Run an external check after uploading to confirm your icon is live and rendering correctly
That Tiny Icon in the Browser Tab Is Working for Your Brand
The word “favicon” is short for “favorite icon.” It started as the small image that older browsers attached to bookmarked pages. Browsers expanded the idea over time, and today a favicon appears in tabs, bookmark menus, browser history lists, mobile home screen shortcuts, and even certain search engine result layouts depending on the device.
For a small business owner, that reach matters. When someone has multiple tabs open while comparing services in your industry, your favicon is the one thing that lets them identify your tab without reading. A strong favicon anchors your brand in visual memory. A missing one quietly signals that the site is unfinished, which is the last impression you want to leave.
You do not need a complicated logo to create an effective favicon. You need something bold, simple, and readable at 32×32 pixels, which is literally the size of a thumbnail. The simpler the better, because detail gets lost at that scale.
What Your Favicon Should Look Like Before You Upload It
WordPress handles the technical resizing on your behalf, but you still need to start with a file that gives it something good to work with. Prepare your image with these points in mind before you upload anything:
- File format: PNG is the safest choice. It supports transparency and crisp edges. JPEG compresses in ways that look blurry at small sizes.
- Dimensions: Create your file at 512×512 pixels. WordPress generates smaller versions from this source.
- Shape: Design for a square canvas. Some browsers round the corners slightly, so keep important elements centered and away from the edges.
- Simplicity: If your full logo has long text beside the icon mark, do not use the full logo. Use just the icon, a single letter, or a simplified version of your symbol.
- Contrast: Most browser tab bars have a light background. Check that your favicon remains visible against white or very light grey before you upload.
Free tools like Canva or Adobe Express let you design one quickly. Alternatively, you can export a clean, cropped version of your existing logo. The goal is legibility at thumbnail size, not visual richness.
How to Add a Favicon in WordPress, Step by Step
WordPress labels your favicon as a “Site Icon.” You will find the upload option inside the Customizer, which is the live-preview panel you may have used before to adjust your site’s colors or fonts. Here is the full process:
- Log into your WordPress dashboard. Navigate to yoursite.com/wp-admin and enter your credentials.
- Open the Customizer. In the left sidebar, click Appearance, then click Customize. A panel opens on the left with a live preview of your site on the right.
- Click on Site Identity. This is usually the first item in the Customizer panel. You will see fields for your Site Title, Tagline, and, further down, the Site Icon section.
- Click “Select site icon.” WordPress opens the Media Library, where you can upload files directly from your computer.
- Upload your PNG file. Either drag your file into the upload area or click “Upload Files” and select it. Once it appears in the library, click it to select it, then click “Select.”
- Crop if prompted. WordPress may display a cropping tool. If your image is already a perfect square, simply confirm the crop and proceed.
- Click Publish. This saves and applies the change to your live site. Your favicon is now set.
No plugins, no FTP access, no code. WordPress takes care of generating the correctly sized file once you upload the source image.
What If You Are Using a Block Theme or a Page Builder?
Some newer block-based themes route you through the Site Editor rather than the classic Customizer. If Appearance shows “Editor” instead of “Customize,” open the Editor and look for a Site Identity or Header settings panel. The upload process is the same. You are still uploading a Site Icon PNG; the path to find it just looks a little different.
Page builder plugins like Elementor and Divi generally defer to WordPress’s native Site Icon setting, so the Customizer method described above still applies even if you built your pages with a builder.
Why Your Favicon Might Not Appear Right After You Upload It
You clicked Publish, refreshed your browser, and the tab still shows a blank grey square. This is one of the most common points of confusion for site owners, and it is almost never a sign that something went wrong with the upload itself.
Browsers cache favicons aggressively. Your browser may have stored a record of the blank icon and will keep displaying it until that cache is cleared. A hard refresh usually fixes this immediately. On Windows, press Ctrl+Shift+R. On a Mac, press Cmd+Shift+R. You can also open an incognito or private window and visit your site from there, since private browsing does not carry over cached files and will show the current live state.
Your hosting server or caching plugin can also be the culprit. If you are running a plugin like WP Super Cache, W3 Total Cache, or LiteSpeed Cache, go to that plugin’s settings and clear the cache manually. This forces fresh files to be sent to visitors instead of the older cached version.
Give it a few minutes after clearing caches. If the favicon still does not appear, the most reliable next step is to check what your live domain is actually serving using an external tool.
Confirming Your Favicon Is Live and Rendering Correctly
Your own browser is not always an accurate reflection of what the wider internet sees. Caching, browser extensions, and local settings can all distort the picture. An external check removes that uncertainty.
Running your URL through a favicon checker fetches the icon directly from your live domain and shows you exactly what browsers will see. Enter your site URL, run the scan, and the tool returns whatever icon your site is currently serving. If the result is blank or shows the wrong image, you know right away that something needs attention, rather than finding out because a customer mentioned it.
Look for two things when reading the result. First, confirm the icon is displaying at all. Second, confirm it looks sharp and not stretched or pixelated. If it appears blurry, your source image may have been too small or a low-quality JPEG rather than a crisp PNG.
Per published favicon standards, browsers look for your icon in multiple places, including a file called favicon.ico at the root of your domain and a link tag in your page’s HTML head. WordPress generates both automatically when you upload a Site Icon through the Customizer. This is exactly why using the built-in settings is more reliable than manually uploading a file to your server root.
Other Places Your Favicon Shows Up That Are Easy to Overlook
Once you have confirmed the tab icon is working, check a few additional places where your favicon appears without you realizing it.
Bookmark your own homepage and look at the bookmarks bar. Your favicon should appear beside the page title. Pin the tab in Chrome or Edge and watch it shrink to just the icon. On mobile, if a visitor saves your site to their phone’s home screen, the Site Icon becomes the app-style shortcut icon on their device. Each of these moments is a brand impression. Each one benefits from having a clean, intentional icon instead of a blank square.
Your Tab Now Carries Your Brand Wherever It Goes
A favicon is the kind of thing you set up once and then stop thinking about. But its effect runs quietly in the background every single time someone has your site open, saved, or pinned. Every tab, every bookmark, every mobile shortcut reinforces who you are as a business.
The setup inside WordPress takes about five minutes. The external check takes under a minute. Together, they close a gap that many small business sites leave open for months without realizing it.
Your tab has a face now. Make sure it looks the part.