
Switching hosting providers doesn’t have to mean watching your traffic disappear or your revenue tank. Most site owners assume downtime is inevitable during a migration, but with the right approach, your visitors won’t notice a thing. Your site stays live, your business keeps running, and you sleep better at night knowing nothing broke in the process.
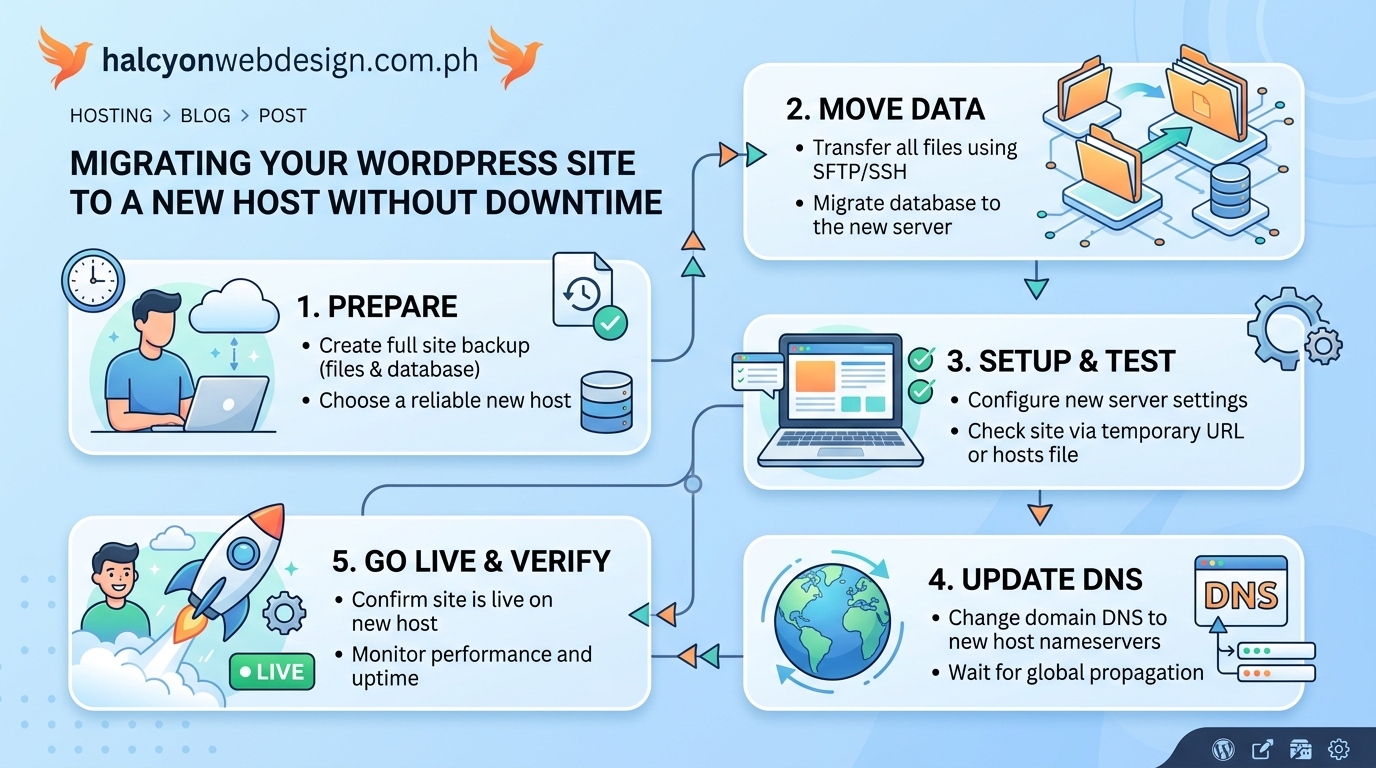
You can migrate your WordPress site to a new host without downtime by setting up the new environment first, testing thoroughly, then switching DNS records only when everything works perfectly. This approach keeps your current site running while you build and verify the new one. Most migrations take 2 to 4 hours of active work spread across a few days.
Why downtime costs more than you think
Every minute your site is offline, you lose opportunities.
A small business might miss 10 orders during a two-hour outage. A blogger could lose search rankings if Google crawls during downtime. A membership site risks frustrated users who can’t access content they paid for.
The financial impact adds up fast. If your site generates $50 per hour in revenue, a four-hour migration means $200 gone. For larger operations, the numbers get scary.
But the reputation damage hurts more. Users who encounter errors remember. They tell friends. They leave reviews. One bad migration can cost you trust that took years to build.
The good news? You can avoid all of this with proper planning.
Understanding the migration process
Moving a WordPress site means copying three things: files, database, and configuration.
Your files live in the WordPress directory. This includes themes, plugins, uploads, and core WordPress files. The database holds your posts, pages, comments, users, and settings. The configuration tells WordPress how to connect everything.
Most people get into trouble when they try to do everything at once. They take the old site offline, copy files, update DNS, and hope it works. This creates a window where nothing functions properly.
The better approach builds the new site while the old one keeps running. You set up a complete copy on the new host, test until everything works, then switch traffic over in seconds.
Think of it like building a new house before you move out of your old one. You don’t sleep on the sidewalk between homes.
Preparing for a zero-downtime migration
Start by documenting your current setup.
Make a list of every plugin you use. Note which ones are active. Check for custom code in your theme’s functions.php file. Look for modifications in .htaccess or wp-config.php. Write down any custom DNS records beyond the basics.
This inventory saves hours of troubleshooting later.
Next, clean up your site before migrating. Delete unused plugins and themes. Remove spam comments. Clear out old post revisions. A leaner site migrates faster and has fewer things that can break.
Back up everything before you start. You need a full backup of files and database. Store it somewhere safe, not just on your current host. Download a copy to your computer.
If something goes wrong during migration, this backup is your safety net.
Setting up your new hosting environment

Log into your new hosting account and create a temporary subdomain or use the server’s temporary URL.
Most hosts provide something like temp123.newhost.com or an IP address you can use for testing. This lets you build the new site without touching your live domain.
Install WordPress on this temporary location. Use the same version you currently run. Don’t upgrade WordPress during migration. That adds variables that make troubleshooting harder.
Configure your hosting environment to match your current setup as closely as possible. Check your PHP version on the old host and set the new host to match. Look at memory limits, max upload sizes, and execution times. The more similar the environments, the smoother your migration goes.
Some hosting providers offer migration assistance, but understanding the process yourself means you can verify their work and catch mistakes before they affect users.
Transferring files and database
Use an FTP client or your hosting control panel to download all WordPress files from your current host.
Get everything in the public_html or www directory. This includes wp-content, wp-admin, wp-includes, and all the files in the root directory.
Upload these files to your new hosting account’s temporary location. This takes time, especially if you have thousands of images. Let it run in the background while you handle the database.
Export your database from the current host using phpMyAdmin. Choose the export option and select SQL format. Download this file to your computer.
Import the database on your new host. Create a new database first, then use phpMyAdmin to import the SQL file you downloaded. This might take a few minutes if you have a large database.
Now update wp-config.php on the new host with the new database credentials. Change the database name, username, password, and host to match what your new hosting provider gave you.
Updating URLs and testing thoroughly
Your database still contains references to your old domain or temporary URL.
Use a search and replace tool to update these. Better Search Replace is a reliable plugin for this task. Install it on your new temporary site and search for your old domain, replacing it with the temporary URL.
Be careful with this step. One wrong character can break your entire site.
After the search and replace, test everything. Click through every page. Test your contact forms. Try logging into the admin area. Check that images load properly. Test any e-commerce functionality if you have it.
Look for broken links or missing images. Check that your theme displays correctly. Verify all plugins activate without errors.
This testing phase separates successful migrations from disasters. Spend extra time here. It’s easier to fix problems now than after you’ve switched DNS.
If you’re using a caching plugin, make sure it works properly on the new host. Some caching configurations are host-specific and need adjustment.
Reducing DNS propagation time
DNS propagation is the delay between when you change your DNS records and when everyone sees the new server.
This typically takes 24 to 48 hours, but you can minimize the impact.
A few days before migration, lower your domain’s TTL (time to live) value to 300 seconds (5 minutes). This tells DNS servers not to cache your DNS records for long. Most DNS providers let you change this in your domain management panel.
This step alone dramatically reduces the time it takes for DNS changes to spread across the internet.
When you’re ready to switch, you’ll update your A record to point to your new host’s IP address. With a low TTL, most users will see the new server within minutes instead of hours.
For more details on how this process works, check out what DNS propagation is and why it takes time.
The actual migration day
You’ve tested everything on the temporary URL. Your site works perfectly. Now it’s time to switch traffic to the new host.
-
Put your current site in maintenance mode using a plugin like WP Maintenance Mode. This shows a friendly message to new visitors while you make the switch.
-
Do one final backup of both your old and new sites. You want a snapshot of this exact moment.
-
Export your database from the old site one last time. Import this fresh copy to the new host. This captures any posts, comments, or orders that came in during your testing period.
-
Update your DNS records. Change your A record to point to your new host’s IP address. If you have a www subdomain, update that too. Keep all other DNS records the same unless your new host requires changes.
-
Wait 5 to 10 minutes for DNS to start propagating. Check your site using the new host’s IP address directly to verify it’s working.
-
Remove maintenance mode from both the old and new sites.
Your site is now serving from the new host for most visitors. Some people will still see the old host for a few hours due to DNS caching, but that’s fine. Both sites are live and functional.
Monitoring the transition period
For the next 48 hours, both your old and new hosting accounts need to stay active.
Some visitors will still reach the old server due to DNS caching. If you take the old site offline too soon, those users see errors.
Check your site multiple times per day from different devices and networks. Mobile data often uses different DNS servers than home WiFi, so test both.
Monitor your analytics for unusual drops in traffic. Watch for error reports. Check that scheduled posts publish correctly. Verify that contact forms still deliver emails.
Keep an eye on your site speed during this period. Your new host should perform at least as well as the old one.
If you notice problems, you can still roll back. Just point DNS back to the old host. This is why you keep both sites running during the transition.
Common migration mistakes and how to avoid them
| Mistake | Why It Happens | How to Prevent It |
|---|---|---|
| Skipping the backup | Confidence that nothing will go wrong | Always backup before starting, no exceptions |
| Upgrading WordPress during migration | Trying to do two things at once | Migrate first, upgrade later as a separate task |
| Forgetting to update wp-config.php | Rushing through the database setup | Double-check database credentials before testing |
| Not testing email functionality | Assuming email works if the site loads | Send test emails from contact forms and WordPress |
| Taking the old site offline too early | Impatience or trying to save money | Wait 48 hours minimum before canceling old hosting |
| Ignoring SSL certificate setup | Focusing only on getting the site to load | Configure SSL on new host before switching DNS |
The SSL certificate issue trips up many people. Your new host needs an SSL certificate installed and configured before you switch DNS. Otherwise, visitors get security warnings. Most hosts offer free SSL through Let’s Encrypt, but you need to activate it.
For help with SSL problems, see common SSL certificate errors and fixes.
Handling email during migration
Email configuration often gets overlooked during site migrations.
If your email runs through your hosting provider, you need to set it up on the new host before switching DNS. Otherwise, incoming email bounces or disappears.
The safest approach is moving email to a dedicated service like Google Workspace or Zoho before migration. This separates your email from your hosting, so website changes don’t affect email delivery.
If you must keep email with your hosting, set up all email accounts on the new host first. Test that you can send and receive before changing DNS. Update your email client settings to use the new server’s details.
Check your MX records. These tell other servers where to send your email. If your new host requires different MX records, update them at the same time you change your A record.
Verifying everything works after migration
After DNS has fully propagated (usually 48 hours), run through a complete site audit.
Test every form on your site. Submit contact forms, newsletter signups, and checkout processes. Verify that emails arrive at the right addresses.
Check your cron jobs. WordPress uses cron for scheduled tasks like publishing posts and checking for updates. Sometimes these break during migration. Install WP Crontrol to verify scheduled events are running.
Review your security settings on the new host. Some security configurations are server-specific and need reconfiguration.
Test your backup system. If you use a backup plugin, verify it’s creating backups on the new host and storing them in the right location.
Run speed tests using tools like GTmetrix or Google PageSpeed Insights. Your new host should perform at least as well as your old one. If speed dropped significantly, investigate caching configuration or server resources.
Check that your site appears correctly in Google Search Console. Submit your sitemap again if needed. Monitor for any crawl errors that might indicate broken links or configuration problems.
When to consider professional migration services
Some migrations are straightforward. Others involve complex configurations that can break in subtle ways.
Consider hiring help if your site has any of these characteristics:
- Custom integrations with third-party APIs
- E-commerce functionality with active orders
- Membership areas with subscription billing
- Multi-site WordPress installations
- Custom server configurations or .htaccess rules
- High traffic that makes testing difficult
Professional migration services cost $100 to $500 depending on site complexity. That’s often cheaper than the revenue you’d lose from extended downtime or broken functionality.
Many hosting providers include free migration assistance. Take advantage of this if available. Their teams migrate sites daily and know the common pitfalls.
Just remember that even with professional help, you should understand the process. You need to verify their work and catch mistakes before they affect users.
Troubleshooting common post-migration issues
Even careful migrations sometimes have hiccups.
If your site shows a database connection error, double-check wp-config.php. The database credentials must match exactly what your new host provided. One wrong character breaks everything.
White screens or 500 errors often mean PHP version incompatibility. Check that your new host runs the same PHP version as your old host. You can usually change this in your hosting control panel.
If images don’t load, the URLs might still point to your old host. Run another search and replace to catch any missed references.
Permalink problems show up as 404 errors on posts and pages. Go to Settings > Permalinks in WordPress and click Save Changes without changing anything. This regenerates the .htaccess file with the correct rules.
For more detailed troubleshooting, see why your WordPress site shows 404 errors after migration.
Optimizing your new hosting environment
After migration, take time to optimize your new setup.
Enable caching at the server level if your host offers it. Many hosts provide built-in caching that’s faster than plugin-based solutions.
Configure your CDN if you use one. Update the CDN settings to pull from your new host’s IP address.
Review your backup schedule and ensure backups run automatically. Test restoring from a backup to verify the process works.
Check your PHP settings. Increase memory limits if needed. Adjust max upload sizes for your typical file sizes. These small tweaks prevent problems down the road.
Install only the plugins you actually need. Every plugin you don’t use is a security risk and potential performance drain.
Planning your next migration
Even after a successful migration, document what you did.
Write down the steps you followed. Note any problems you encountered and how you solved them. Save your backup files and keep them for at least 30 days.
This documentation makes your next migration easier. You’ll remember the tricky parts and avoid repeating mistakes.
Consider setting a reminder to review your hosting needs annually. Technology changes. Your site grows. What worked last year might not work next year.
Regular hosting evaluation keeps you from getting stuck with poor performance or outdated technology.
Moving forward with confidence
Migrating a WordPress site to a new host without downtime isn’t magic. It’s methodical preparation, careful testing, and patience during the DNS transition.
The key is building the new environment completely before switching traffic. Test everything twice. Keep both sites running during the transition period. Monitor closely for the first few days.
Most site owners who experience downtime during migration rushed the process or skipped testing. They assumed everything would work and found out the hard way that assumptions break sites.
You now have a clear roadmap. Follow these steps, take your time with testing, and your users won’t notice anything except maybe a faster site on better hosting. That’s exactly how it should be.