You just launched your WordPress site. Congratulations.
But here’s the thing: Google doesn’t automatically know your site exists. You need to tell Google about it, and that’s where Google Search Console comes in. This free tool helps you submit your site for indexing, monitor how it appears in search results, and catch technical problems before they hurt your rankings.
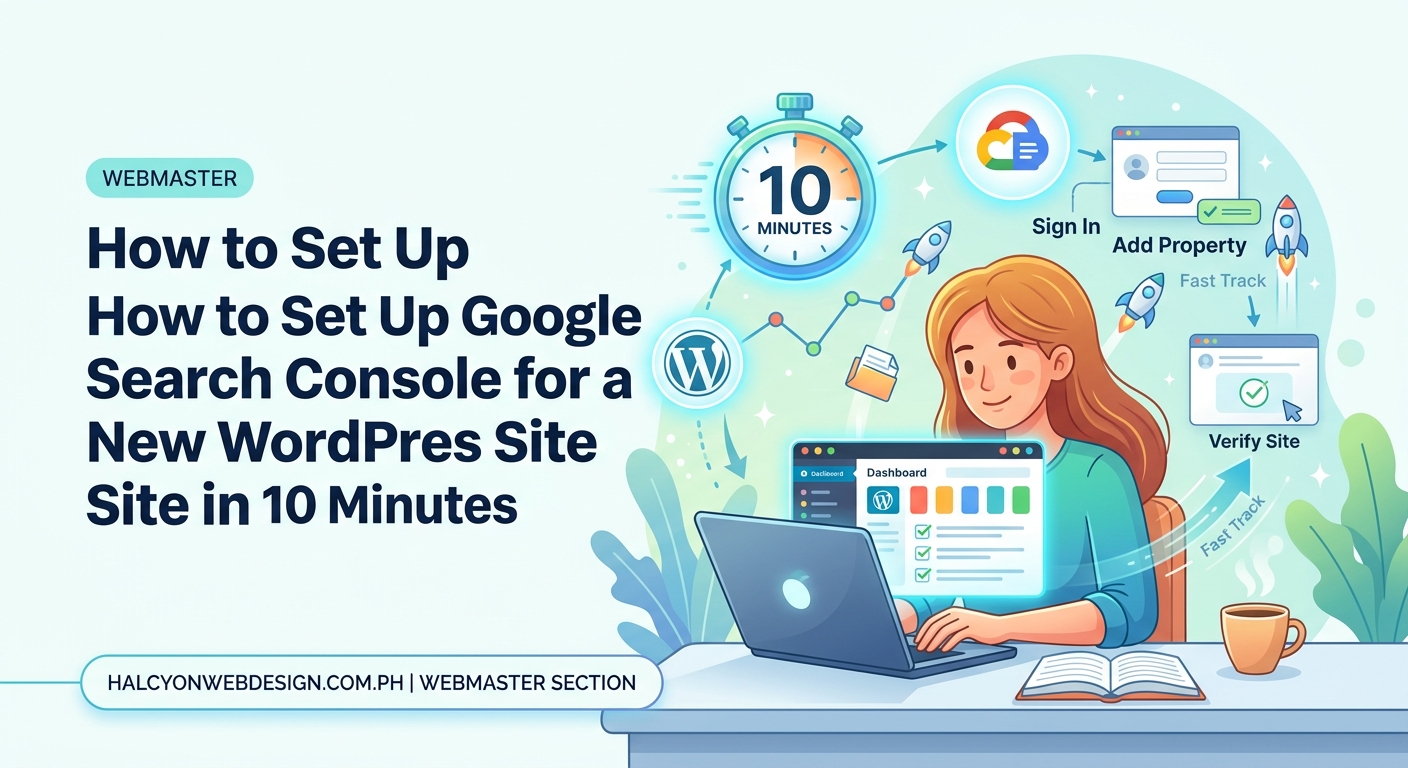
Adding Google Search Console to WordPress takes about 15 minutes. You’ll create a free account, verify ownership using an HTML tag or file upload, submit your sitemap, and start monitoring indexing status. This setup is essential for getting your pages into Google search results and tracking performance over time.
What Google Search Console actually does for your WordPress site
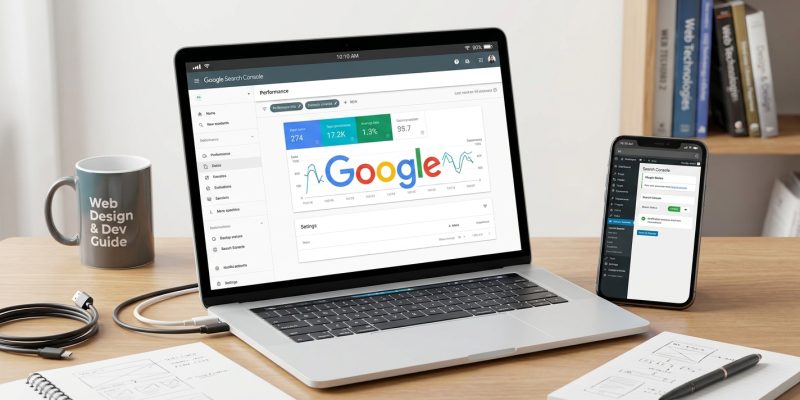
Google Search Console is a monitoring dashboard. It shows you which pages Google has indexed, how often your site appears in search results, and what errors might be blocking your content from ranking.
Without it, you’re flying blind. You won’t know if Google can crawl your pages, if your sitemap is working, or if technical issues are keeping your content out of search results.
The tool is completely free. Google provides it to help webmasters improve their sites, and you should take advantage of it the day you launch.
Creating your Google Search Console account
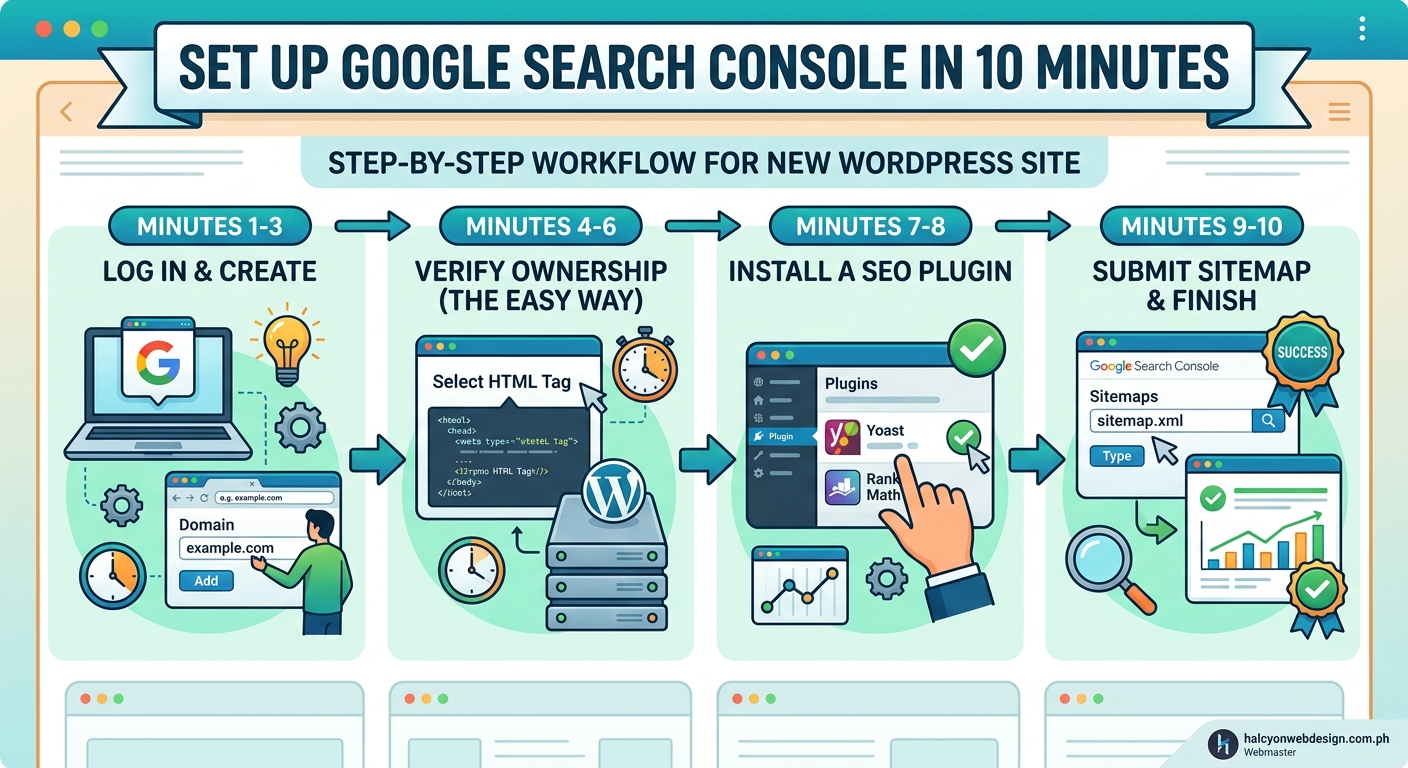
Start by visiting Google Search Console. Sign in with the Google account you want to use for site management.
You’ll see two options: Domain property or URL prefix property.
Choose URL prefix. It’s simpler for beginners and works perfectly for most WordPress sites. Enter your full site URL including https:// and click Continue.
Domain properties require DNS verification, which is more complex and usually unnecessary unless you’re managing multiple subdomains.
Five verification methods explained
Google needs proof that you own the site before it shares data with you. You’ll see several verification options. Here are the most common ones for WordPress users.
HTML tag method
This is the easiest method if you’re comfortable editing your theme or using a plugin.
Google gives you a meta tag that looks like this:
You need to add this tag to the <head> section of your site. Most SEO plugins like Yoast, Rank Math, or All in One SEO have a dedicated field for verification codes. Paste the code there, save, and return to Search Console to click Verify.
If you’re not using an SEO plugin, you can add the tag manually by editing your theme’s header.php file. But be careful with theme edits. One wrong character can break your site layout.
HTML file upload method
Google provides a small HTML file for you to download. Upload this file to your site’s root directory using FTP or your hosting file manager.
Your root directory is usually called public_html or www. The file should be accessible at yourdomain.com/google-verification-file.html.
After uploading, click Verify in Search Console. Keep the file on your server permanently. If you delete it, verification will fail during future checks.
Google Analytics method
If you already have Google Analytics installed on your WordPress site, you can verify through that connection. Search Console will detect the Analytics tracking code and confirm ownership automatically.
This method only works if you’re using the same Google account for both tools.
Google Tag Manager method
Similar to Analytics, if you have Google Tag Manager installed and you’re using the same Google account, Search Console can verify ownership through that existing connection.
Domain name provider method
This method requires adding a TXT record to your domain’s DNS settings. It’s more technical and usually unnecessary for WordPress users. Stick with the HTML tag or file upload unless you have a specific reason to use DNS verification.
Submitting your sitemap after verification
Once verified, you need to tell Google where to find your sitemap. A sitemap is an XML file that lists all your pages, making it easier for Google to crawl your site efficiently.
WordPress doesn’t generate sitemaps automatically in older versions, but WordPress 5.5 and later includes a basic sitemap at yourdomain.com/wp-sitemap.xml.
If you’re using an SEO plugin, it probably creates a better sitemap. Check your plugin settings to find the sitemap URL. Common locations include:
yourdomain.com/sitemap_index.xml(Yoast SEO)yourdomain.com/sitemap.xml(Rank Math)yourdomain.com/sitemap_index.xml(All in One SEO)
In Search Console, go to Sitemaps in the left sidebar. Enter your sitemap URL in the field and click Submit.
You’ll see a status message confirming submission. It may take a few days for Google to fully process the sitemap and start indexing your pages. For more detailed guidance, check out how to submit your sitemap to Google Search Console step by step.
Understanding the verification dashboard
After verification, you’ll see several sections in Search Console. Here’s what each one does.
Overview: A summary of your site’s performance, including total clicks, impressions, and any critical errors.
Performance: Shows which search queries bring visitors to your site, your average position in results, and click-through rates. This is where you’ll spend most of your time once your site has traffic.
URL Inspection: Lets you check the indexing status of individual pages. Paste any URL from your site to see if Google has crawled it and whether there are any problems.
Coverage: Lists all indexed pages and highlights any errors preventing indexing. Common issues include pages blocked by robots.txt, 404 errors, or server errors.
Sitemaps: Displays the status of submitted sitemaps and shows how many URLs Google discovered through each one.
Mobile Usability: Identifies pages with mobile-friendly issues. Google prioritizes mobile-first indexing, so fixing these problems is critical.
Core Web Vitals: Reports on page speed and user experience metrics. These factors affect your rankings directly.
Common verification mistakes that block setup
Some users run into problems during verification. Here are the most frequent issues and how to fix them.
Meta tag in wrong location: The verification tag must go in the <head> section, not the body. If you’re adding it manually, make sure it’s between <head> and </head> tags.
HTML file in wrong directory: The verification file must be in your root directory, not a subdomain or subfolder. Double-check the upload location.
Verification file deleted too soon: Keep the file or meta tag on your site permanently. Google rechecks verification periodically.
Plugin conflicts: Some caching or security plugins strip out meta tags. Temporarily disable caching plugins during verification, then re-enable them afterward.
HTTPS vs HTTP mismatch: Make sure you’re verifying the same URL version your site uses. If your site redirects from HTTP to HTTPS, verify the HTTPS version.
| Verification method | Best for | Difficulty level |
|---|---|---|
| HTML tag | Users with SEO plugins | Easy |
| HTML file upload | Users with FTP access | Moderate |
| Google Analytics | Sites already using GA | Easy |
| Google Tag Manager | Sites already using GTM | Easy |
| DNS record | Advanced users managing multiple subdomains | Hard |
Monitoring your first indexing results
After submitting your sitemap, Google will start crawling your site. This doesn’t happen instantly. Expect a delay of a few days to a few weeks, depending on your site’s age and authority.
Check the Coverage report regularly. You should see the number of valid pages increase as Google indexes your content.
If you see errors, don’t panic. Most are fixable. Common errors include:
- Submitted URL marked ‘noindex’: You’ve told Google not to index the page through a meta tag or plugin setting. Remove the noindex directive if you want the page indexed.
- Submitted URL blocked by robots.txt: Your robots.txt file is preventing Google from crawling the page. Edit the file to allow access.
- Server error (5xx): Your hosting server returned an error when Google tried to crawl the page. Contact your host if this persists.
- Redirect error: The page redirects in a loop or to an invalid URL. Fix your redirect settings.
For more troubleshooting help, see why is my website not showing up on Google and 7 common indexing issues.
Setting up email notifications for critical issues
Search Console can alert you when it detects problems. Turn on email notifications so you don’t miss important warnings.
Go to Settings in the left sidebar. Under Users and permissions, make sure your email is listed. Then check the email preferences to enable notifications for:
- New critical issues in Coverage
- Manual actions (penalties)
- Security issues
- Core Web Vitals problems
These alerts help you respond fast when something breaks. Ignoring a server error for weeks can tank your rankings.
What to do after your site is verified
Verification is just the start. Here’s what to do next.
- Check indexing status weekly. Look for new errors in the Coverage report and fix them promptly.
- Monitor performance data. Once you have a few weeks of traffic, analyze which pages and keywords perform best.
- Request indexing for new content. When you publish a new post or page, use the URL Inspection tool to request indexing. This speeds up the process.
- Fix mobile usability issues. Check the Mobile Usability report and address any problems. Mobile-friendliness affects rankings.
- Track Core Web Vitals. Improve page speed and user experience metrics to boost your rankings. Learn more about understanding core web vitals and page experience metrics.
- Review security issues immediately. If Search Console flags malware or hacked content, drop everything and fix it. Your site could be delisted.
Using Search Console data to improve your content
Search Console isn’t just a diagnostic tool. It’s a goldmine for content ideas.
The Performance report shows which queries bring visitors to your site. Look for keywords where you rank on page two (positions 11-20). These are opportunities. You’re close to page one, so a little optimization could push you higher.
Also check queries with high impressions but low clicks. Your page is showing up in search results, but users aren’t clicking. Improve your title tags and meta descriptions to make them more compelling. For guidance, read how to write meta descriptions that actually get clicks.
Handling ‘crawled but not indexed’ pages
You might see pages labeled “Crawled – currently not indexed” in the Coverage report. Google visited the page but chose not to include it in search results.
This happens when Google considers the page low quality, duplicate, or not useful enough to index. It’s common for new sites with little authority.
To fix it:
- Improve the content quality. Add more depth, examples, and unique insights.
- Build internal links to the page from other parts of your site.
- Make sure the page provides real value and isn’t thin or duplicate content.
For a detailed walkthrough, see how to fix crawled currently not indexed in Google Search Console.
Connecting Search Console to Google Analytics
If you use Google Analytics, linking it to Search Console gives you richer data. You’ll see search queries and landing pages directly in your Analytics reports.
In Google Analytics 4, go to Admin > Property Settings > Product Links > Search Console Links. Follow the prompts to connect your verified Search Console property.
This integration helps you understand the full user journey from search query to site behavior.
For more on tracking performance, explore 5 critical Google Analytics 4 reports every webmaster should monitor weekly.
Keeping your site healthy after setup
Search Console isn’t a one-time setup. It’s an ongoing monitoring tool.
Set a reminder to check it weekly. Look for new errors, track indexing progress, and review performance trends.
If you make major changes to your site like switching themes, migrating hosts, or changing your URL structure, check Search Console immediately afterward. These changes can cause indexing problems that need fast attention.
Also, if you’re planning to safely switch WordPress themes without losing your content or SEO rankings, monitor Search Console closely during and after the transition.
“Search Console is your direct line to Google. It tells you exactly what Google sees when it crawls your site. Ignoring it is like driving with your eyes closed.”
Troubleshooting verification failures
If verification keeps failing, here’s a checklist to work through.
- Clear your site cache and your browser cache, then try again.
- Disable any security plugins temporarily. Some block Google’s verification bot.
- Make sure you’re verifying the correct URL. Check for typos.
- Confirm the verification tag or file is still in place. Some updates or plugin changes can remove it.
- Wait 24 hours. Sometimes DNS or server changes take time to propagate.
If you’re still stuck, try a different verification method. The HTML file upload is usually the most reliable fallback.
Configuring settings after initial setup is complete
Once verified, review your Search Console settings. Go to Settings in the left sidebar.
Property settings: Confirm your site URL is correct. If you move to HTTPS or change your domain, you’ll need to add a new property.
Users and permissions: Add team members if you’re working with others. You can grant full access, restricted access, or view-only access.
Associations: Link your Search Console property to Google Analytics, Google Ads, or other Google tools for integrated reporting.
Crawl rate settings: Google usually handles this automatically, but if you’re on shared hosting and experiencing server overload, you can request a slower crawl rate.
Why some WordPress sites take longer to index
New sites often take longer to index than established ones. Google doesn’t trust brand-new domains yet, so it crawls them less frequently.
If your site has been live for weeks and still shows zero indexed pages, check these common blockers:
- Discourage search engines setting enabled: In WordPress, go to Settings > Reading. Make sure “Discourage search engines from indexing this site” is unchecked. This setting adds a noindex tag to every page.
- No internal links: If your pages aren’t linked from your navigation or other pages, Google might not find them. Build a clear internal linking strategy for beginners to build authority the smart way.
- Robots.txt blocking crawlers: Check your robots.txt file at
yourdomain.com/robots.txt. Make sure it’s not blocking important pages. - Server errors: If your hosting is unstable, Google might give up trying to crawl your site. Check your server uptime and response times.
Also make sure you’ve configured 10 essential WordPress settings right after installation to avoid common setup mistakes.
Requesting indexing for individual pages
You don’t have to wait for Google to discover new content. You can request indexing manually.
Go to the URL Inspection tool in Search Console. Paste the URL of your new page and press Enter. Search Console will check the page and show its current status.
If it’s not indexed yet, click “Request Indexing.” Google will prioritize crawling that URL within a few days.
This is especially useful for time-sensitive content like news articles, product launches, or event announcements.
Reading performance reports without getting overwhelmed
The Performance report can feel intimidating at first. Here’s how to make sense of it.
Total clicks: How many times users clicked your site in search results.
Total impressions: How many times your site appeared in search results, whether users clicked or not.
Average CTR (click-through rate): The percentage of impressions that resulted in clicks. A higher CTR means your titles and descriptions are compelling.
Average position: Your average ranking position for all queries. Lower numbers are better (position 1 is the top result).
Use the filters to narrow down the data. For example, filter by page to see which URLs perform best, or filter by query to see which keywords drive traffic.
Compare date ranges to spot trends. Are you gaining or losing clicks over time? Which pages are improving, and which are declining?
Making the most of Search Console’s diagnostic tools
Search Console includes several diagnostic features beyond basic indexing reports.
Manual Actions: Shows if Google has penalized your site for violating quality guidelines. Most sites never see a manual action, but if you do, fix the issue immediately and request a review.
Security Issues: Alerts you to malware, phishing, or hacked content. These are critical. If flagged, your site could be removed from search results entirely.
Links: Shows which external sites link to yours and which internal pages you link to most. This helps you understand your site’s link profile and identify opportunities for improvement.
Experience: Combines Core Web Vitals, mobile usability, and HTTPS usage into a single report. Google uses these signals for ranking, so keep an eye on them.
Getting your site ready for Search Console before verification
Before you even verify, make sure your WordPress site is properly configured. This saves time and prevents indexing problems later.
- Install an SEO plugin like Yoast, Rank Math, or All in One SEO. These plugins generate sitemaps, manage meta tags, and simplify Search Console integration.
- Make sure your site uses HTTPS. Google prioritizes secure sites. If you haven’t set up SSL yet, read 5 common SSL certificate errors and how to fix them fast.
- Create a clear site structure with logical categories and internal links. This helps Google understand your content hierarchy.
- Optimize your images. Large image files slow down your site, which hurts both user experience and rankings. Learn how to optimize images for web without losing quality.
Turning Search Console insights into action
Data is useless if you don’t act on it. Here’s a simple workflow for using Search Console effectively.
Every Monday, check the Coverage report for new errors. Fix any issues you find.
Every two weeks, review the Performance report. Identify pages with declining clicks and investigate why. Are competitors ranking higher? Is your content outdated?
Once a month, audit your Core Web Vitals. If you see poor scores, prioritize speed improvements. Tools like 7 free tools to test and improve your Core Web Vitals score can help.
When you publish new content, request indexing through the URL Inspection tool. Don’t wait for Google to find it on its own.
Your site is now visible to Google
Adding Google Search Console to WordPress is one of the most important steps you’ll take as a site owner. It connects your site to Google’s ecosystem, gives you visibility into how search engines see your content, and provides the tools you need to fix problems before they hurt your rankings.
Verification takes just a few minutes, but the insights you gain will shape your SEO strategy for years. Check Search Console regularly, act on the data it provides, and watch your site grow in search results.