
Your website disappeared overnight. All your content, images, customer data, gone. No warning. No recovery option.
This nightmare happens more often than you’d think. Servers fail. Hackers strike. Updates break things. Without a proper backup, you’re starting from scratch.
The good news? You don’t need expensive plugins or technical wizardry to protect your site. Manual backups give you complete control and work on any hosting plan.
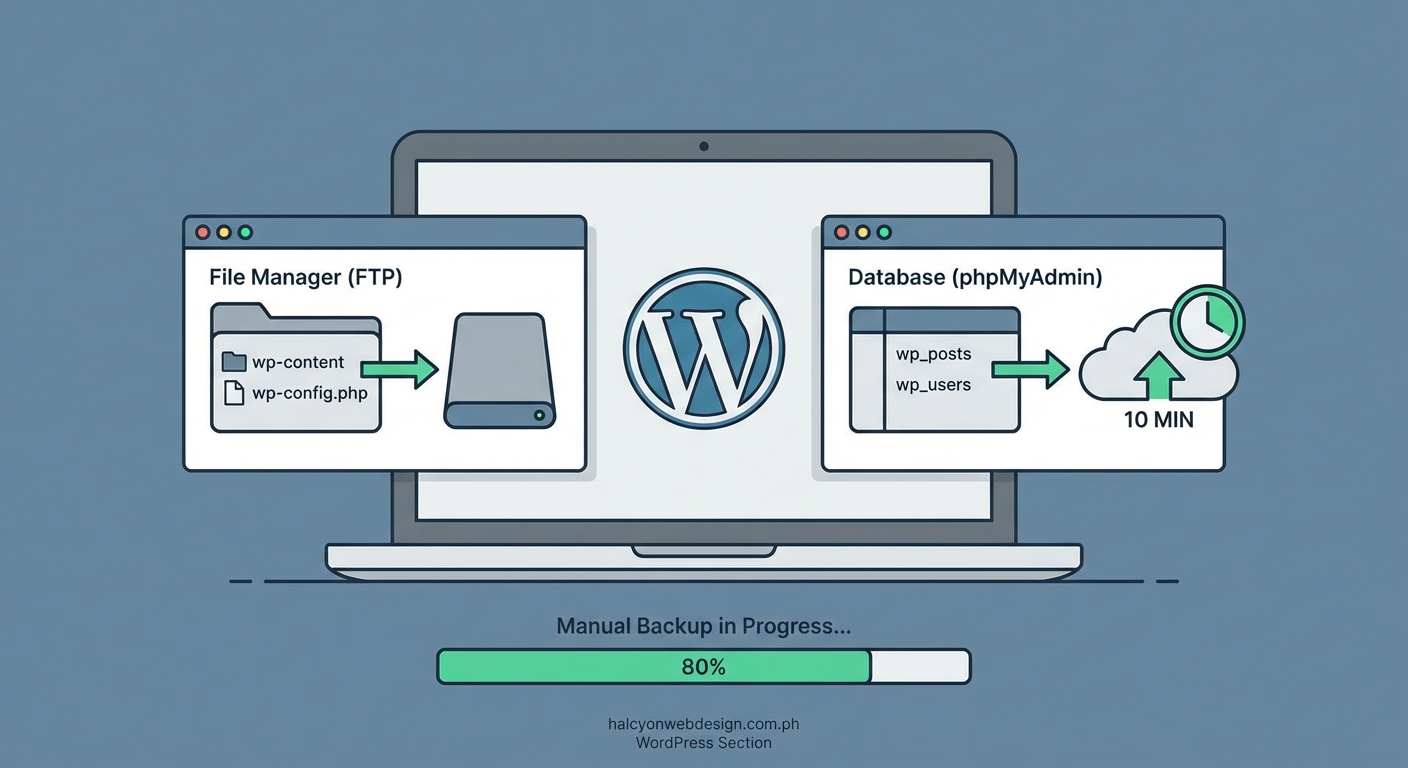
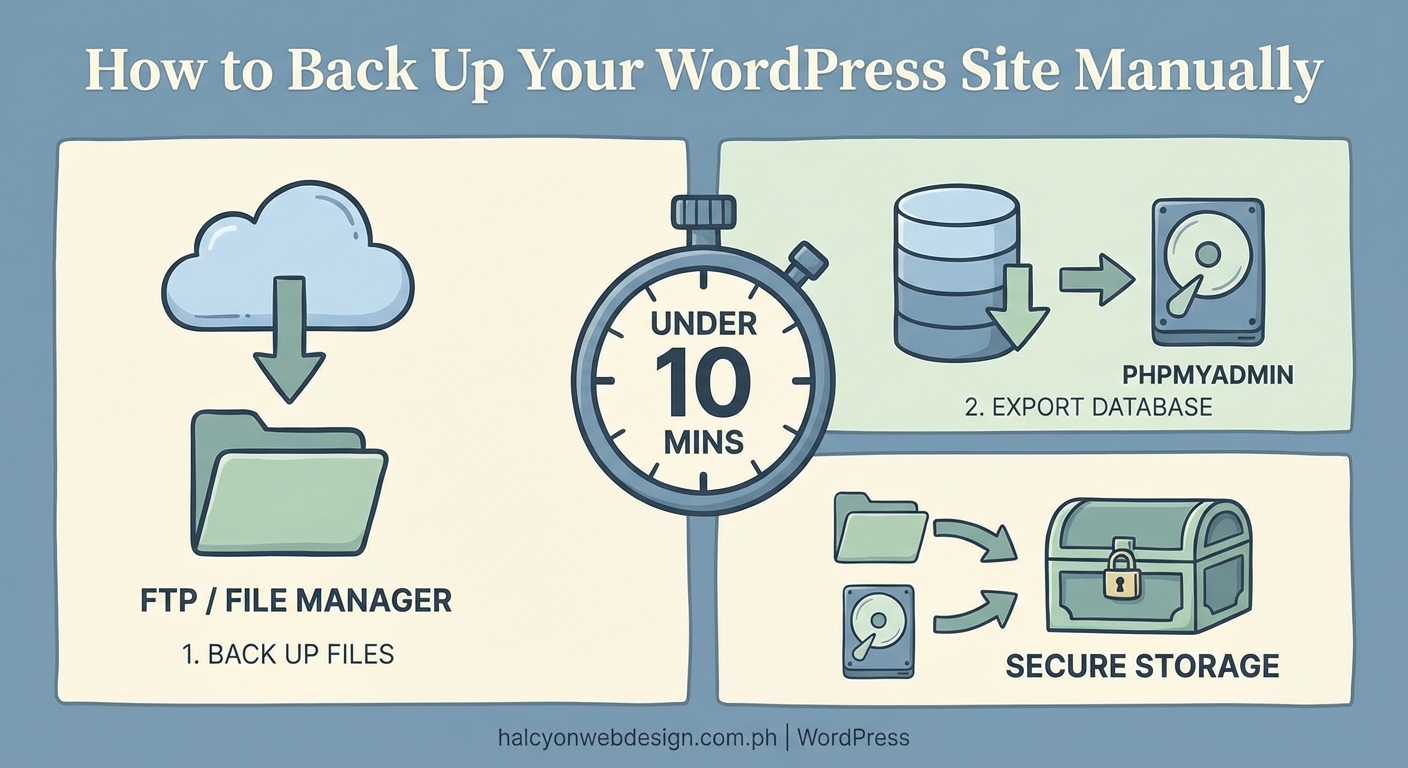
Backing up your WordPress site manually involves two essential steps: downloading your website files via FTP and exporting your database through phpMyAdmin. This method requires no plugins, works on any host, and gives you complete control over your backup files. Store both components safely, and you can restore your entire site whenever needed, protecting against data loss from updates, hacks, or server failures.
Why Manual Backups Beat Plugin Solutions
Plugins seem convenient. Install, click a button, done.
But they come with hidden costs.
Most backup plugins slow down your site. They run in the background, consuming server resources during peak traffic hours. Some free versions limit backup size or frequency. Premium versions cost $50 to $200 yearly.
Manual backups avoid these problems entirely.
You control exactly when backups happen. You choose where files are stored. You’re not dependent on a plugin developer who might abandon their project or introduce bugs in the next update.
Plus, understanding the manual process helps you troubleshoot problems. When an automated backup fails, you’ll know exactly what went wrong and how to fix it.
What You’re Actually Backing Up
WordPress sites have two distinct parts. Both need backing up.
Your files include everything visible on your server. Themes, plugins, uploaded images, custom code. These live in folders you can see and download.
Your database stores the invisible stuff. Post content, comments, user accounts, settings, plugin configurations. This lives in MySQL tables that require special export tools.
Miss either component, and your backup is useless.
Think of it like backing up your phone. Photos are files. Contacts are database entries. You need both to fully restore your device.
Tools You’ll Need Before Starting
Gather these items before you begin:
- FTP client software like FileZilla (free) or Cyberduck (free)
- Your hosting login credentials from your welcome email or control panel
- At least 500MB of free hard drive space (more for larger sites)
- 30 minutes of uninterrupted time for your first backup
Your hosting provider supplies FTP credentials. Look in cPanel, your hosting dashboard, or contact support if you can’t locate them.
You’ll need four pieces of information:
– FTP hostname (often your domain or an IP address)
– FTP username
– FTP password
– Port number (usually 21 for FTP or 22 for SFTP)
Write these down. You’ll use them repeatedly.
Step 1: Download Your WordPress Files
Open your FTP client and create a new connection.
Enter your hostname, username, password, and port. Choose SFTP instead of FTP if available. It’s more secure and works the same way.
Click connect.
You’ll see two panels. The left shows your computer’s files. The right shows your server’s files.
On the server side, navigate to your WordPress installation. Most hosts put it in a folder called public_html, www, or httpdocs. Some use your domain name as the folder.
Look for these telltale WordPress folders:
– wp-admin
– wp-content
– wp-includes
Found them? You’re in the right place.
Create a new folder on your computer called “WordPress Backup” followed by today’s date. Something like “WordPress Backup 2024-01-15” works perfectly.
Now select all the WordPress files and folders on the server. Right-click and choose “Download” or drag them to your local backup folder.
This takes time. A typical small site runs 200 to 500MB. Larger sites with lots of images might hit 2GB or more.
Don’t interrupt the transfer. Let it finish completely.
Pro tip: If your connection drops mid-transfer, most FTP clients can resume where they left off. Just reconnect and start the download again. FileZilla will skip already-downloaded files automatically.
Step 2: Export Your Database
Log into your hosting control panel. Most hosts use cPanel, Plesk, or a custom dashboard.
Find the “Databases” section and click phpMyAdmin. This opens a new window with your database management tool.
You’ll see a list of databases on the left sidebar. Which one is yours?
Check your wp-config.php file to be sure. Download it from your FTP client (it’s in your WordPress root folder) and open it with a text editor.
Look for this line:
define(‘DB_NAME’, ‘your_database_name’);
That’s your database name. Remember it.
Back in phpMyAdmin, click that database name in the left sidebar. The interface shows all your WordPress tables. They typically start with wp_ unless you changed the prefix during installation.
Click the “Export” tab at the top.
Choose these settings:
– Export method: Custom
– Format: SQL
– Tables: Select All (or just the ones starting with your prefix)
– Output: Save output to a file
– Compression: gzip (makes the file smaller)
Leave everything else at default settings.
Click “Go” at the bottom.
Your browser downloads a .sql.gz file. Save it in the same backup folder with your WordPress files.
This file contains your entire database. Every post, page, comment, and setting.
What Your Backup Should Look Like
Open your backup folder. You should see:
- All your WordPress folders (wp-admin, wp-content, wp-includes)
- All your WordPress root files (wp-config.php, index.php, etc.)
- One compressed database file (.sql.gz or .sql)
That’s a complete backup.
Label the folder clearly with the date. If you maintain multiple sites, include the domain name too.
Where to Store Your Backups Safely
Your computer’s hard drive isn’t enough.
Computers crash. Hard drives fail. Coffee spills happen.
Follow the 3-2-1 backup rule:
– 3 copies of your data (original plus two backups)
– 2 different storage types (external drive and cloud storage)
– 1 offsite copy (cloud or remote location)
Good storage options include:
- External hard drive: Fast, cheap, but vulnerable to physical damage
- Cloud storage: Dropbox, Google Drive, OneDrive. Accessible anywhere, survives local disasters
- Network attached storage (NAS): Great for multiple sites, higher upfront cost
- Second computer: Better than nothing, still shares local risks
Encrypt sensitive backups before uploading to cloud services. Your database contains email addresses, usernames, and potentially customer data.
Most cloud services offer automatic sync. Drop your backup folder in a synced directory and forget about it.
How Often Should You Back Up?
It depends on how often your site changes.
| Site Type | Backup Frequency | Reason |
|---|---|---|
| Blog (weekly posts) | Weekly | New content appears regularly |
| Business site (static) | Monthly | Content rarely changes |
| E-commerce store | Daily | Orders and inventory update constantly |
| Membership site | Daily | User data changes frequently |
| Personal portfolio | Monthly | Updates happen sporadically |
Always backup before major changes:
– Theme updates
– Plugin updates
– WordPress core updates
– Adding new functionality
– Making design changes
One failed update can break your entire site. A backup taken five minutes earlier saves hours of recovery work.
Set a recurring calendar reminder. Treat backups like paying bills or securing your WordPress login page. Essential maintenance, not optional.
Common Backup Mistakes to Avoid
Storing backups only on your server defeats the purpose. If the server fails, your backups disappear too. Always download backups to a separate location.
Forgetting the database leaves you with a shell of a site. Files without a database show blank pages and broken functionality.
Never testing restores means you might discover your backup is corrupted only when disaster strikes. Test a restore on a staging site or local environment at least once.
Backing up during high traffic can slow your site to a crawl or cause the backup to fail. Schedule backups during off-peak hours, typically early morning in your timezone.
Keeping only one backup is risky. What if you need to restore from before your last backup? Keep at least three versions: this week, last week, and last month.
How to Verify Your Backup Works
Download both your files and database to a test location.
Set up a local WordPress installation using XAMPP, MAMP, or Local by Flywheel. These free tools create a WordPress environment on your computer.
Upload your backed-up files to the local installation. Import your database through phpMyAdmin.
Update the wp-config.php file with your local database credentials.
Visit your local site in a browser. Does everything work? Can you see posts, pages, and images?
If yes, your backup is solid.
If no, troubleshoot now while your live site still works. Don’t wait for an emergency to discover problems.
Automating Manual Backups with Scripts
You can schedule manual backups without plugins using cron jobs and bash scripts.
Most hosting control panels include a cron job manager. You write a simple script that:
- Compresses your WordPress files into a zip
- Exports your database to SQL
- Moves both to a backup directory
- Deletes backups older than 30 days
This gives you plugin-free automation while maintaining full control.
The script runs at scheduled intervals (daily at 3 AM, for example) without slowing your site during business hours.
Fair warning: this requires basic command-line knowledge. If terms like “bash script” and “cron job” sound foreign, stick with manual backups until you’re ready to learn. Mistakes in automated scripts can delete files instead of backing them up.
When Manual Backups Make the Most Sense
Manual backups shine in specific situations:
Small sites with infrequent updates don’t need daily automated backups. A monthly manual backup takes ten minutes and costs nothing.
Sites on shared hosting with resource limits benefit from manual backups that don’t consume server resources during peak hours.
Developers working on client sites often prefer manual backups before making changes. Full control, no plugin conflicts.
Budget-conscious site owners avoid recurring plugin subscription fees. Manual backups are completely free.
Privacy-focused sites keep data under their direct control rather than trusting third-party plugin developers.
That said, high-traffic sites with daily content updates might benefit from automated solutions. Consider your specific needs and choose accordingly. Sometimes spending money on a reliable backup plugin makes sense if your time is better spent elsewhere.
Restoring from a Manual Backup
You’ll eventually need to restore a backup. Maybe an update broke something. Maybe a hacker got in. Maybe you just want to undo changes.
The process reverses your backup steps:
- Upload your backed-up files via FTP, overwriting existing files
- Import your backed-up database through phpMyAdmin, replacing current tables
- Update wp-config.php if database credentials changed
- Clear your cache and check the site
Test everything thoroughly. Click through pages. Submit a form. Check your shopping cart if you run a store.
Some hosts offer one-click staging environments where you can test restores without affecting your live site. Use this feature if available.
Keeping Your Backup Strategy Simple
Don’t overcomplicate this.
You need two things: files and database. Download both regularly. Store them safely in multiple locations.
That’s it.
Fancy backup solutions with incremental backups, cloud automation, and real-time syncing have their place. But they’re not necessary for most small sites.
Start with basic manual backups. Master the process. Understand what you’re protecting and why.
Add complexity only when simple stops working.
A basic backup you actually perform beats a sophisticated system you never use.
Your Site Deserves Protection
Backing up manually takes less time than scrolling social media during your morning coffee.
You’re protecting months or years of work. Blog posts you spent hours writing. Products you carefully photographed and described. Customer relationships you built over time.
One backup prevents starting over from nothing.
Set aside 30 minutes this week. Download your files. Export your database. Store both safely.
Then schedule your next backup and actually do it. Your future self will thank you when disaster strikes and you’re the only one who can restore everything in minutes instead of mourning what’s lost forever.
The best time to back up was yesterday. The second best time is right now.