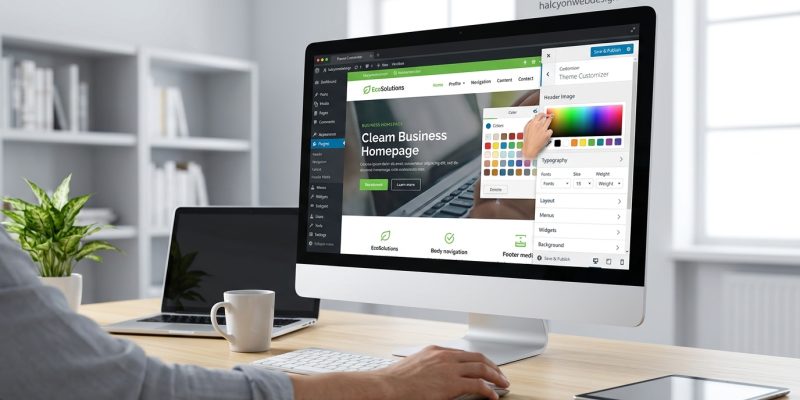
You’ve installed a WordPress theme, but it doesn’t quite match your vision. The colors feel off. The fonts don’t represent your brand. The layout needs tweaking. You know what you want, but opening code files feels overwhelming. The good news? You can customize your WordPress theme without coding and make your site truly yours.
You can personalize your WordPress site’s appearance using native customizer tools, page builders like Elementor or Beaver Builder, and specialized plugins for typography, colors, and layouts. Most modern themes include visual editors that let you adjust fonts, colors, spacing, and widgets through point-and-click interfaces. For advanced changes, plugins extend functionality without requiring technical knowledge, while child themes protect your customizations during updates.
Understanding the WordPress Customizer
The WordPress Customizer is your first stop for theme changes. Every WordPress installation includes this built-in tool.
Access it by navigating to Appearance > Customize from your dashboard. You’ll see a live preview of your site alongside adjustment panels.
The interface varies by theme, but most include these sections:
- Site Identity (logo, site title, tagline, favicon)
- Colors (background, text, link colors)
- Menus (navigation structure)
- Widgets (sidebar and footer content)
- Homepage Settings (static page or blog posts)
- Additional CSS (optional styling)
Changes appear instantly in the preview panel. Nothing goes live until you click Publish.
Some themes add custom sections. Premium themes often include typography controls, layout options, and header/footer builders right inside the customizer.
“The customizer is designed for non-technical users. If you can click a button and type text, you can customize your theme.” – WordPress Core Team
Changing Colors and Typography

Colors and fonts define your site’s personality. Most themes let you adjust these without touching code.
Adjusting Color Schemes
Look for a Colors or Color Options panel in your customizer. You’ll typically find controls for:
- Primary color (used for buttons, links, accents)
- Secondary color (supporting elements)
- Background colors (site background, content areas)
- Text colors (body text, headings)
- Header and footer colors
Click any color selector to open a color picker. Choose from preset colors or enter hex codes for brand-specific colors.
If you’re unsure about color combinations, choosing the perfect color palette for your website in 5 steps can help you create harmonious schemes.
Modifying Fonts
Typography controls vary widely by theme. Basic themes might only offer font size adjustments. Feature-rich themes provide:
- Font family selection (Google Fonts libraries with hundreds of options)
- Font weight (light, regular, bold, extra bold)
- Font size (often with separate mobile/desktop controls)
- Line height (spacing between lines)
- Letter spacing (space between characters)
Select different fonts for headings and body text. Maintain readability by keeping body text between 16-18px.
Watch for typography mistakes that make your website look unprofessional while making font changes.
Using Page Builders for Layout Control
Page builders transform WordPress into a drag-and-drop design platform. They work alongside your theme to create custom layouts.
Popular Page Builder Options
| Page Builder | Best For | Learning Curve | Free Version |
|---|---|---|---|
| Elementor | Beginners and pros | Easy | Yes |
| Beaver Builder | Clean, reliable layouts | Moderate | Yes |
| Divi Builder | All-in-one solution | Moderate | No |
| Gutenberg | Native WordPress editing | Easy | Built-in |
| WPBakery | Legacy sites | Moderate | No |
Installing a Page Builder
- Navigate to Plugins > Add New in your dashboard.
- Search for your chosen page builder (Elementor, Beaver Builder, etc.).
- Click Install Now, then Activate.
- Follow the setup wizard if one appears.
- Create a new page or edit an existing one.
- Click the “Edit with [Builder Name]” button.
Page builders replace the default editor with a visual interface. You’ll see your page as visitors will, with editable sections.
Building Custom Layouts
Page builders work with widgets or modules. Drag elements onto your page:
- Text blocks
- Images and galleries
- Buttons and call-to-action boxes
- Contact forms
- Testimonials
- Pricing tables
- Video embeds
- Social media feeds
Arrange elements in columns. Most builders support complex layouts with nested rows and responsive breakpoints.
Adjust spacing, colors, and typography for individual elements. Changes apply only to that specific page unless you create reusable templates.
Customizing Headers and Footers
Headers and footers frame your content. Many themes include header/footer builders in their settings.
Header Customization Options
Access header settings through Appearance > Customize or your theme’s options panel. Common adjustments include:
- Logo upload and sizing
- Menu position (left, center, right)
- Header layout (transparent, sticky, full-width)
- Top bar (phone number, email, social icons)
- Search bar visibility
- Mobile menu style (hamburger, slide-out, dropdown)
Sticky headers remain visible while scrolling. Enable this option if you want persistent navigation access. You can even build a sticky header with pure CSS if your theme doesn’t include this feature.
Footer Customization
Footer areas typically contain:
- Widget areas (3-4 columns for content blocks)
- Copyright text
- Secondary navigation menus
- Social media links
- Contact information
Add widgets by going to Appearance > Widgets. Drag widgets into footer areas. Common footer widgets include:
- Text (for copyright notices)
- Recent Posts
- Categories
- Custom HTML (for embed codes)
- Image (for logos or badges)
- Social Icons
Working with Widgets and Sidebars
Widgets add functionality to sidebars, footers, and other widget-ready areas. They’re modular content blocks you can arrange without coding.
Navigate to Appearance > Widgets. You’ll see available widgets on the left and widget areas on the right.
Adding and Configuring Widgets
- Find the widget you want to add.
- Drag it to your desired widget area (sidebar, footer, etc.).
- Click the widget to expand its settings.
- Configure options (title, content, display rules).
- Click Save.
Reorder widgets by dragging them up or down within the same area. Remove widgets by clicking Delete or dragging them back to the available widgets section.
Useful Widget Types
- Search: Adds a search box
- Recent Posts: Displays your latest blog posts
- Categories: Shows post categories as links
- Tag Cloud: Visual representation of popular tags
- Calendar: Monthly calendar with post dates
- Custom HTML: Embed code, forms, or custom content
- Image: Display graphics or badges
- Text: Add formatted text content
Many plugins add their own widgets. Contact form plugins, social media plugins, and advertising plugins often include widget options.
Installing Customization Plugins
Plugins extend your theme’s capabilities without requiring code knowledge. Choose plugins that match your specific needs.
Typography and Font Plugins
- Easy Google Fonts: Adds comprehensive font controls to the customizer
- Custom Fonts: Upload your own font files
- Use Any Font: Converts fonts for web use
Color and Style Plugins
- Simple Custom CSS: Adds a user-friendly CSS editor (for those who want to learn)
- Yellow Pencil: Visual CSS style editor
- Microthemer: Point-and-click styling tool
Layout and Design Plugins
- Custom Sidebars: Create unlimited sidebar variations
- Widget Options: Add display conditions to widgets
- Header Footer Code Manager: Insert scripts without editing theme files
Before Installing Plugins
Check plugin reviews and update history. Look for:
- Recent updates (within the last 3 months)
- High ratings (4+ stars)
- Active installations (thousands of users)
- WordPress version compatibility
- Responsive developer support
Installing too many plugins can slow your site. Choose quality over quantity. Learn about choosing the right WordPress plugin without breaking your site before adding new tools.
Creating and Using Child Themes
Child themes protect your customizations during theme updates. They inherit the parent theme’s functionality while allowing safe modifications.
Why Child Themes Matter
Parent themes receive updates from developers. These updates overwrite any direct changes you make to theme files.
A child theme creates a protective layer. Your customizations live in the child theme, which doesn’t get overwritten during parent theme updates.
You need a child theme if you plan to:
- Modify theme template files
- Add custom functions
- Make extensive CSS changes
- Customize theme behavior
Creating a Child Theme Without Coding
Use a plugin to generate child themes automatically:
- Install the Child Theme Configurator plugin.
- Navigate to Tools > Child Themes.
- Select your parent theme from the dropdown.
- Choose “Create New Child Theme.”
- Enter a child theme name.
- Click “Create New Child Theme.”
- Activate your new child theme.
The plugin creates the necessary files and structure. Your site looks identical, but now you can make safe customizations.
For more details, read about when you need a child theme and how to create it safely.
Customizing Specific Page Elements
Different page types need different customization approaches. WordPress treats posts, pages, and archives distinctly.
Homepage Customization
Set your homepage layout in Settings > Reading. Choose between:
- Latest posts (traditional blog layout)
- Static page (custom homepage design)
If you select a static page, create a new page first. Design it using your page builder or the block editor. Then assign it as your homepage.
Many themes include dedicated homepage templates with unique layouts and sections.
Blog and Archive Pages
Blog page layouts typically include:
- Post grid or list view
- Featured images
- Excerpts or full content
- Pagination or load more buttons
- Sidebar or full-width layout
Control these options in your theme settings or customizer. Look for sections labeled Blog, Archive, or Post Layout.
Individual Post Customization
Most themes offer post-specific options:
- Featured image display
- Author bio visibility
- Related posts
- Comments section
- Social sharing buttons
- Post navigation (previous/next links)
Some themes include a metabox below the post editor with these controls. Others place them in the customizer under Post Settings or Single Post Layout.
Managing Menus and Navigation
Navigation menus guide visitors through your site. WordPress lets you create multiple menus for different locations.
Creating Custom Menus
- Go to Appearance > Menus.
- Click “Create a new menu.”
- Give your menu a name (like “Main Navigation” or “Footer Menu”).
- Click “Create Menu.”
- Add items from the left sidebar (pages, posts, custom links, categories).
- Drag items to reorder them.
- Indent items to create dropdown submenus.
- Assign the menu to a location (Primary Menu, Footer Menu, etc.).
- Click “Save Menu.”
Menu Item Options
Click the arrow on any menu item to expand its options:
- Navigation Label (the text visitors see)
- Title Attribute (tooltip text on hover)
- CSS Classes (for custom styling)
- Link Target (open in new window/tab)
- Description (some themes display this)
Remove items by clicking “Remove.” Create hierarchies by dragging items slightly right to nest them under parent items.
Common navigation mistakes include too many top-level items and unclear labels. Keep main navigation to 5-7 items. Learn about WordPress menu navigation mistakes that confuse your visitors.
Adjusting Mobile Responsiveness
Mobile devices account for over 50% of web traffic. Your customizations must work on all screen sizes.
Testing Mobile Display
Most customizers include device preview buttons. Click the mobile phone icon to see how your site looks on smaller screens.
Better yet, test on actual devices. Check your site on:
- iPhone (Safari)
- Android phone (Chrome)
- iPad (Safari)
- Android tablet (Chrome)
Look for these common mobile issues:
- Text too small to read
- Buttons too small to tap
- Images extending beyond screen width
- Overlapping elements
- Horizontal scrolling
- Menu not accessible
Mobile-Specific Adjustments
Many themes include mobile-specific controls:
- Mobile font sizes (separate from desktop)
- Mobile menu style (hamburger, slide-out, dropdown)
- Element visibility (hide certain sections on mobile)
- Touch-friendly button sizes
- Reduced spacing for smaller screens
Page builders often include responsive editing modes. Design separate layouts for desktop, tablet, and mobile viewports.
Understanding mobile-first design principles every beginner should know helps create better mobile experiences.
Troubleshooting Common Customization Issues
Problems happen. Here’s how to fix common issues without technical knowledge.
Changes Not Appearing
If customizations don’t show on your live site:
- Clear your browser cache (Ctrl+Shift+Delete on Windows, Cmd+Shift+Delete on Mac)
- Clear your WordPress cache (if using a caching plugin)
- Check if you clicked “Publish” in the customizer
- Try viewing in an incognito/private browser window
- Disable browser extensions that might interfere
Sometimes WordPress theme customizer won’t save changes due to server limitations or plugin conflicts.
Broken Layout After Changes
If your layout breaks:
- Revert to a previous version using the customizer’s revision history.
- Deactivate recently installed plugins one by one.
- Switch to a default WordPress theme temporarily to identify if the issue is theme-related.
- Check for JavaScript errors in your browser console (F12 key).
Slow Site After Customizations
Too many customizations can impact performance:
- Limit the number of active plugins
- Optimize images before uploading
- Use web-safe fonts or limit custom font variations
- Remove unused widgets and menu items
- Enable caching
Check if your WordPress theme is slowing down your website and take corrective action.
Conflicts Between Plugins
Plugin conflicts cause unexpected behavior:
- Deactivate all plugins except your page builder.
- Test if the issue persists.
- Reactivate plugins one at a time, testing after each.
- When the issue returns, you’ve found the conflicting plugin.
- Look for alternative plugins or contact the developer.
Learn how to fix plugin conflicts in WordPress systematically.
Backing Up Before Major Changes
Always create backups before making significant customizations. Backups let you restore your site if something goes wrong.
Manual Backup Method
- Access your hosting control panel (cPanel, Plesk, etc.).
- Navigate to File Manager.
- Download your entire WordPress directory.
- Access phpMyAdmin.
- Export your WordPress database.
- Store both files safely on your computer.
Using Backup Plugins
Backup plugins automate the process:
- UpdraftPlus: Popular free option with cloud storage
- BackWPup: Comprehensive backup solution
- Duplicator: Backup and migration tool
Configure automatic backups to run daily or weekly. Store backups in multiple locations (cloud storage, external drive, email).
Read about choosing the right WordPress backup plugin for your site to find the best solution.
Maintaining Your Customizations
Customization is ongoing. Keep your site fresh and functional with regular maintenance.
Regular Tasks
- Weekly: Check for broken links, test forms, review mobile display
- Monthly: Update plugins and themes, review analytics, optimize images
- Quarterly: Audit unused plugins, review color schemes, refresh content
- Yearly: Evaluate if your theme still meets your needs
Documenting Your Changes
Keep notes about your customizations:
- Which plugins you installed and why
- Custom color codes (hex values)
- Font choices and sizes
- Layout decisions and reasoning
- Widget configurations
This documentation helps you (or others) understand your choices later. It’s especially valuable when troubleshooting or redesigning.
Staying Updated
WordPress, themes, and plugins receive regular updates. These updates include:
- Security patches
- Bug fixes
- New features
- Performance improvements
- Compatibility updates
Enable automatic updates for minor releases. Test major updates on a staging site first if possible. Learn about what happens if you skip WordPress updates.
Making Your Theme Truly Yours
You’ve learned how to customize your WordPress theme without writing a single line of code. The customizer, page builders, plugins, and widgets give you powerful tools to shape your site’s appearance.
Start small. Change your colors and fonts first. Get comfortable with the customizer. Then explore page builders for layout control. Add plugins only when you need specific features.
Your website should reflect your brand and serve your visitors. Don’t copy other sites. Use these tools to express your unique vision. Test on mobile devices. Back up before major changes. Document your decisions.
The best part? You can always adjust. Nothing is permanent. Try different approaches. See what works. Your perfect design emerges through experimentation and refinement.
Your WordPress site is now ready to become exactly what you envisioned.