You just installed WordPress. The dashboard is open in front of you. But instead of feeling excited, you’re staring at dozens of menu options wondering which ones actually matter.
Most new site owners waste hours tweaking settings that don’t affect their site at all. Or worse, they skip the important ones and wonder why their site isn’t working right.
Let me show you exactly which settings to adjust first and why they matter for your website.
WordPress settings for beginners should focus on five core areas: site identity, permalinks, reading options, discussion controls, and media handling. Configure these properly during your first hour, and you’ll avoid common problems that plague new sites. Skip them, and you’ll spend weeks troubleshooting issues that could have been prevented with ten minutes of setup work.
General settings establish your site foundation
Your general settings live under Settings > General in your dashboard.
Start with your site title and tagline. These appear in browser tabs, search results, and often in your header. Your site title should clearly state what your site is about. Your tagline can expand on that or you can leave it blank if your theme doesn’t display it.
Set your WordPress address and site address next. These should match unless you’ve installed WordPress in a subdirectory. If they don’t match and you’re not sure why, leave them alone. Changing these incorrectly can lock you out of your site.
Choose your timezone. WordPress defaults to UTC, but you want your actual timezone so scheduled posts publish when you expect them to. If you’re in Manila, select Manila. If you’re in New York, select New York.
Pick your date and time format. This affects how dates appear on your posts and in your dashboard. Choose whatever feels natural to you. Most people stick with the default, but you can customize it if you prefer a different format.
Set your week start day. This only matters if you use WordPress’s built-in calendar widget or scheduling features. Most people leave it on Monday, but if you plan your content week starting on Sunday, change it.
Your timezone setting affects more than you think. It controls when scheduled posts go live, when analytics tools record visits, and how WordPress timestamps everything. Get this right on day one.
Permalink structure affects your SEO forever
Permalinks are your page and post URLs. Once you publish content, changing your permalink structure breaks all your links.
Go to Settings > Permalinks right now.
WordPress defaults to “Plain” permalinks that look like yoursite.com/?p=123. These are terrible for humans and search engines. Nobody wants to share or remember a URL with question marks and random numbers.
Change to “Post name” instead. This creates clean URLs like yoursite.com/your-post-title. People can read them. Search engines understand them. They’re easier to share.
Some people prefer including the date or category in their URLs. That’s fine if you run a news site or a blog where timing matters. But for most beginners, post name works best.
Don’t touch the custom structure box unless you know what you’re doing. The presets cover 99% of use cases.
Save your changes. If you see an error about file permissions, your host needs to update your .htaccess file. Contact their support. They’ll fix it in two minutes.
Reading settings control what visitors see first
Your reading settings determine what appears on your homepage and how much content shows in feeds.
Go to Settings > Reading.
Choose whether your homepage displays your latest posts or a static page. Most business sites and portfolios want a static homepage. Blogs usually show recent posts.
If you choose a static page, you need to create two pages first: one for your homepage and one for your blog. Create them under Pages > Add New, then come back and assign them in your reading settings.
Set how many blog posts show per page. The default is 10. That’s reasonable for most sites. If your posts are long, drop it to 5. If they’re short updates, you could go to 15 or 20.
Decide what feeds should show. Full text or summary? Full text is usually better unless your posts are extremely long. Summaries frustrate readers who use feed readers.
Check your search engine visibility box. Make sure “Discourage search engines from indexing this site” is unchecked. If it’s checked, Google won’t index your site. This is fine while you’re building, but uncheck it before you’re ready for visitors.
If you’re still building your site and don’t want random visitors yet, you can check that box temporarily. Just remember to uncheck it later. Set a reminder. Seriously. People forget this all the time and wonder why Google isn’t finding their site.
Discussion settings prevent spam and manage comments
Comments can be great for engagement. They can also become a spam nightmare if you don’t set up basic protections.
Go to Settings > Discussion.
Decide if you want comments at all. Many sites disable them completely. If you’re running a business site or portfolio, you probably don’t need comments. You can always enable them later.
If you want comments, enable “Comment must be manually approved” and “Comment author must have a previously approved comment.” These two settings stop 90% of spam.
Require users to fill in their name and email. This doesn’t stop spam bots completely, but it helps.
Enable comment moderation for comments containing two or more links. Spammers love dropping links. This catches most of them.
Consider enabling “Users must be registered and logged in to comment” if you run a membership site or want tighter control. But this reduces engagement significantly on public sites.
Set up email notifications so you know when someone comments. You can always turn these off later if they get annoying.
Disable pingbacks and trackbacks unless you know you need them. They’re mostly spam vectors now.
Media settings determine your image sizes
WordPress automatically creates multiple sizes of every image you upload. You control those sizes in Settings > Media.
The default sizes work fine for most sites. Thumbnail at 150px, medium at 300px, large at 1024px.
But if you know your theme uses specific image sizes, match them here. Check your theme documentation. Some themes tell you exactly what sizes they need.
If you’re not sure, leave the defaults. You can change them later. These settings only affect new uploads, not existing images.
One important checkbox: “Organize my uploads into month and year-based folders.” This is enabled by default and keeps your media library organized. Leave it checked unless you have a specific reason not to.
Step by step configuration checklist
Follow this order when setting up a fresh WordPress site:
- Set your site title, tagline, and timezone under General settings
- Change your permalink structure to Post name
- Create homepage and blog pages if you need them
- Configure reading settings and uncheck search engine visibility
- Set up discussion settings to prevent spam
- Review media settings and adjust if your theme requires it
- Create your first few pages and posts to test everything
- Check how your site looks on mobile and desktop
- Test your contact form if you added one
- Verify your permalink structure works correctly
Don’t skip steps. Each one builds on the previous one.
Common settings mistakes beginners make
| Mistake | Why It Hurts | How to Fix |
|---|---|---|
| Leaving permalinks as Plain | URLs look unprofessional and hurt SEO | Change to Post name immediately |
| Forgetting timezone | Posts publish at wrong times | Set your actual timezone in General settings |
| Leaving search visibility checked | Site never appears in Google | Uncheck discourage search engines in Reading settings |
| Skipping comment moderation | Spam floods your site | Enable manual approval in Discussion settings |
| Not testing on mobile | Site breaks on phones | Check responsive design before launching |
| Using default “Just another WordPress site” tagline | Looks amateur in search results | Write a real tagline or remove it |
These mistakes are easy to make and easy to fix. Check your settings right now if you’re not sure.
Settings that can wait until later
You don’t need to touch everything on day one. These settings can wait:
- Privacy policy page (create it when you’re ready to launch)
- Permalink custom structures (post name works for almost everyone)
- Advanced discussion settings (the basics are enough)
- Writing settings (rarely needed anymore)
- Custom media sizes (unless your theme documentation specifically mentions them)
Focus on the essentials first. You can always refine later.
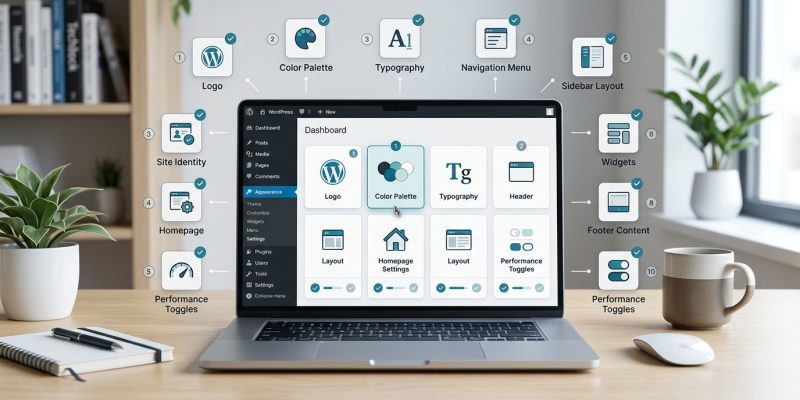
Your theme adds its own settings
After you install a theme, you’ll see new options in your customizer or in a separate theme settings panel.
These vary wildly by theme. Some themes have dozens of options. Others have just a few.
Don’t feel pressured to configure every theme option immediately. Many of them control minor visual details that you can adjust later.
Focus on:
- Logo and site identity
- Color scheme if you want to change it
- Typography if the defaults don’t work for you
- Layout options if your theme offers them
Save the advanced styling for later. Get your content up first.
If you need help choosing the perfect WordPress theme without getting overwhelmed, that guide walks you through the decision process.
Plugins add settings too
Every plugin you install adds its own settings page. Some add a lot of them.
This is where beginners get overwhelmed. You install five plugins and suddenly have 20 new settings pages.
My advice: configure plugins one at a time. Install a plugin, set it up completely, test it, then move to the next one.
Don’t install ten plugins and try to configure them all at once. You’ll forget what you changed and troubleshooting becomes impossible.
If you’re not sure how to choose the right WordPress plugin without breaking your site, read that guide before you start installing everything you find.
When to revisit your settings
Your settings aren’t set in stone. You’ll adjust them as your site grows.
Revisit your discussion settings after your first 50 comments. You might need stricter or looser moderation.
Check your reading settings every few months. You might want to show more or fewer posts per page as your content library grows.
Review your media settings if you change themes. New themes often need different image sizes.
Audit your general settings annually. Your tagline might need updating. Your timezone might change if you move.
But don’t obsess over settings. Spend most of your time creating content and helping your visitors. Settings are important, but content is what brings people to your site.
Security settings you shouldn’t ignore
WordPress doesn’t have a dedicated security settings page, but several settings affect your security.
Under General settings, make sure only you (and trusted team members) can register accounts. Set “Membership” to unchecked unless you’re running a membership site.
Under Discussion settings, enable comment moderation to prevent spam that could contain malicious links.
Consider changing your default admin username from “admin” to something else. Bots try to brute force the admin account constantly.
For more protection, learn how to secure your WordPress login page in 10 minutes. It covers the essential security steps every site needs.
Settings that affect site speed
Some settings directly impact how fast your site loads.
Under Media settings, avoid setting maximum image dimensions too high. If you set large size to 4000px, WordPress creates massive files that slow down your pages. Keep it at 1024px or 2048px maximum.
Under Reading settings, don’t display too many posts per page. Each post adds database queries and images to load. Stick to 10 or fewer for most sites.
Your theme settings often include options for loading fonts, animations, and effects. Each one adds weight to your pages. Enable only what you actually need.
If your site feels slow, check out why your WordPress site loads slowly and how to fix it. Speed problems usually come from themes and plugins, not core settings, but settings can contribute.
Mobile settings matter more than you think
WordPress itself is mobile responsive, but your settings affect how mobile users experience your site.
Under Reading settings, consider showing fewer posts per page. Mobile users scroll more easily than desktop users, but loading 20 posts on a phone connection takes forever.
In your theme settings, test your mobile menu. Many themes let you customize how navigation works on phones. Make sure it’s easy to tap and doesn’t cover your content.
Check your media settings on mobile. Images should scale properly. If they don’t, your theme might need adjustment, not your settings.
For more guidance, read about mobile first design principles every beginner should know. Mobile isn’t optional anymore. Over half your visitors probably use phones.
Settings worth checking after your first month
Give your site a month to run, then review these settings based on real data:
Check your discussion settings. Are you getting too much spam? Tighten moderation. Not enough engagement? Loosen requirements.
Review your reading settings. Do visitors scroll through all your posts or stop halfway? Adjust posts per page accordingly.
Look at your media library. Are your images too large? Adjust media settings and use an optimization plugin.
Audit your general settings. Did you remember to uncheck search engine visibility? Check your analytics. If you have zero Google traffic, you might have forgotten.
Test your permalink structure. Click a few old posts. Do the URLs still work? If you changed permalinks after publishing content, you might need redirects.
Building on your foundation
These settings create the foundation for everything else you do with WordPress.
Get them right now, and you’ll avoid problems later. Your URLs will work. Your images will load properly. Spam won’t overwhelm you. Search engines will find you.
Mess them up, and you’ll spend hours troubleshooting issues that shouldn’t exist.
Take 15 minutes right now to review each settings page. Make the changes I outlined. Test your site. Then move on to creating content.
Your settings are important, but they’re not your site. Your content is your site. These settings just make sure your content works the way it should.
Now that you’ve configured the basics, you’re ready to start building. Create your first pages. Write your first posts. Add your images. Your foundation is solid. Everything else builds from here.